
Installing your Hexagon LED Lighting
Unpack. Assemble. Plug in.
Tubes and connectors fit together by hand, without tools or transformers. Allow 30 to 45 minutes for two people, from unpacking to first light.
What the kit contains
Everything needed for assembly is included. Nothing extra to buy, except specific wall plugs for your surface.
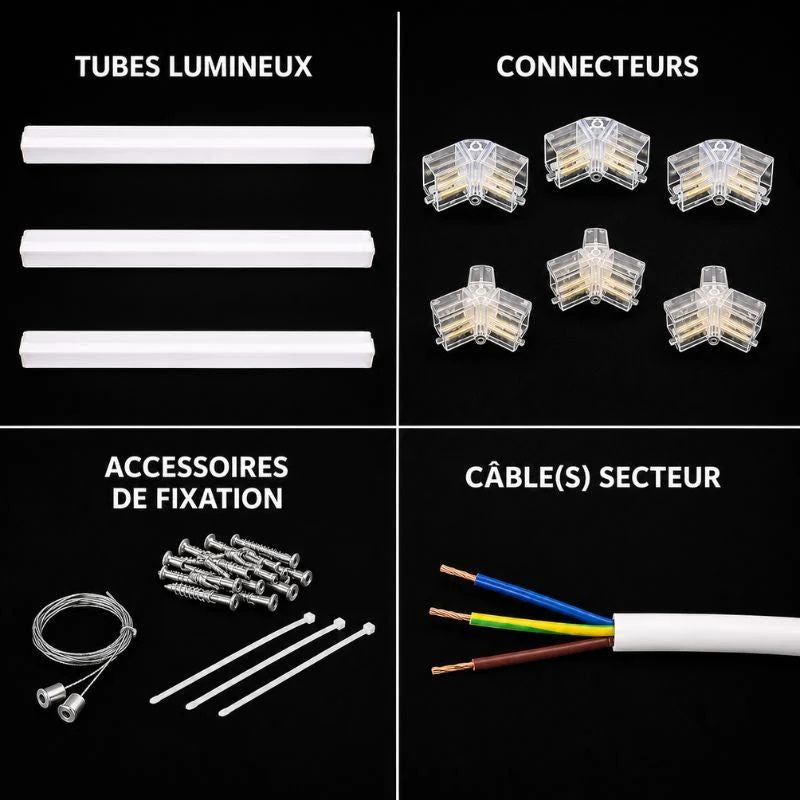
In the box
- Light tubes — ready-to-assemble LED bars
- Connectors — V and Y connectors, 120° angles
- Mounting accessories — screws, anchors, clamps and suspension cables
- Mains cable(s) — 3 conductors, live, neutral and earth
- Illustrated assembly instructions
Connectors are the whole point
Two parts are enough to create any geometry. They set the angle for you: it's impossible to miss the 120°.
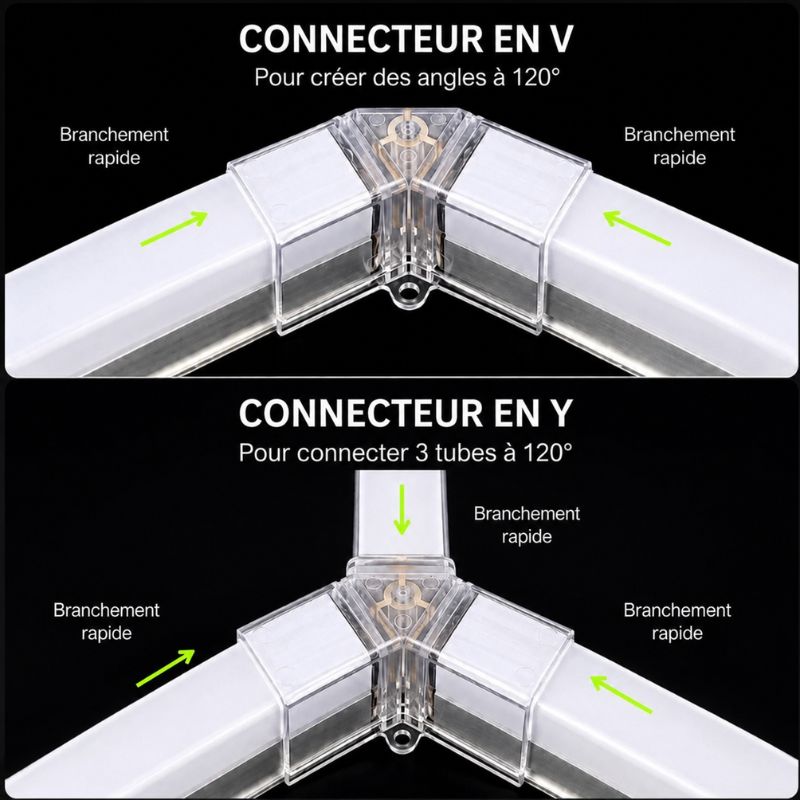
V-connector — 2 tubes
It closes an angle between two bars. It defines the sides of each hexagon.
Y-connector — 3 tubes
It connects three bars at 120°. It is the junction point between two neighboring hexagons, and it is also where the power supply arrives.
A connection that's out of sight
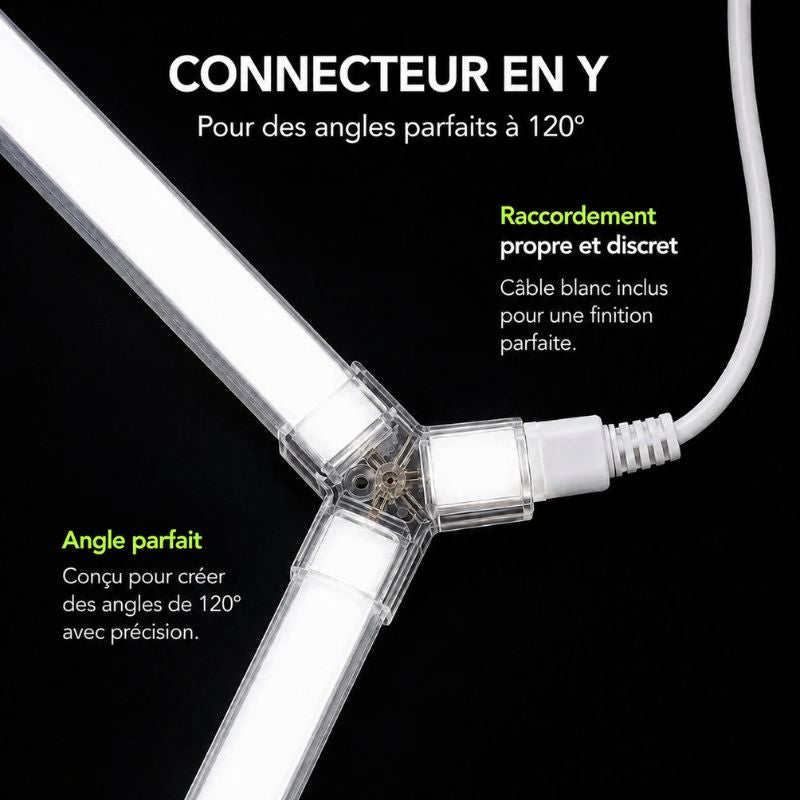
The power cable connects to a Y-connector, with a white sleeve matching the tubes.
From the ground, no housing, driver, or visible transformer can be seen—just the line of light.
5-Step Setup Guide
The first four are done by hand. Only the last one involves electricity.
Unpack and count
Take out the tubes and lay them flat. Count the V and Y connectors, screws, anchors, and clamps against the instructions before climbing the ladder.
Tip — keep the cardboard: it acts as a work surface and prevents scratching the diffusing surfaces.
Dry-assemble on the ground
Assemble the complete figure on the ground, directly below its future location. This allows you to confirm the actual size and orientation before drilling the first hole.
Tip — immediately locate the Y-connector that will receive the power supply, and place it on the side where your electrical input is. This is the mistake that makes you have to dismantle everything again.
Fit the tubes together
Insert each bar into its connector until it clicks. The pins ensure electrical contact and mechanical retention at the same time. No tools, no stripping, no soldering.
Advice — Always work with the power off, cable disconnected.
Attach to the ceiling
Pencil-mark the mounting points, drill, and insert the anchors. The connectors are pre-drilled to directly receive the screws — they bear the entire load. Choose anchors suitable for your wall type: plasterboard, concrete, or wood.
Tip — for an uneven or very high ceiling, use the pendant mounting: each cable is individually adjustable and compensates for the unevenness.
Connect and power on
The power cable supplied has three conductors: brown for live, blue for neutral, green/yellow for earth. It can be connected to a 230 V plug or directly to your existing light fitting via a connection box.
This step is an electrical connection. If you are not comfortable with identifying live/neutral/earth, have it done by an electrician: it's a half-hour job. All the rest of the assembly can be done without any particular skills.
If a bar remains off — cut the power, unclip, then re-engage its connector. In the vast majority of cases, it's a poorly inserted pin.
Two ways to attach it
The same kit can be installed on the ceiling or suspended. Both systems are provided.
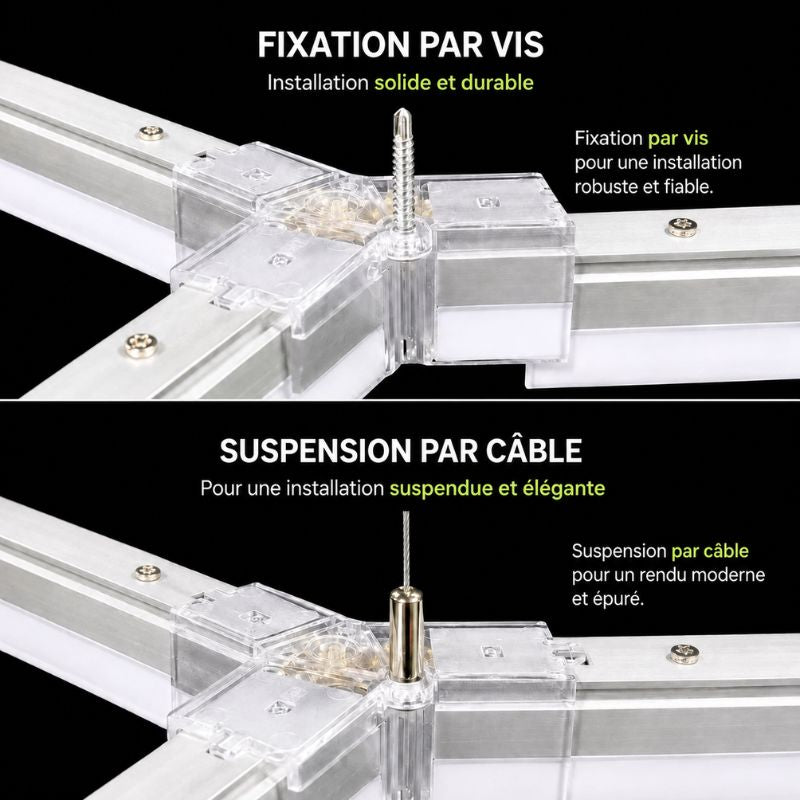
Screw fastening
The most common installation, directly on the ceiling. Solid, permanent, minimal footprint. Ideal for heights between 2.50 to 3.50 m when the ceiling is flat.
Cable suspension
For high ceilings, and irregular frames and ceilings. Each cable is adjusted by hand: you bring the light closer to the work surface and correct for unevenness.
Security
Nothing complex, but nothing to overlook when dealing with 230 V.
- Always assemble and handle the unit when it's turned off and the cable is disconnected.
- The mains cable connection must respect phase, neutral, and earth. If in doubt, call an electrician.
- Check each connector before powering on: no pins should be exposed.
- IP54 rating: indoor use or under shelter. No direct exposure to rain or jet cleaning.
- Adapt plugs and screws to your support. For suspended ceilings, have load-bearing capacity validated.
- Do not open the LED tubes: this voids the 5-year warranty.
Frequently Asked Questions
The questions we are asked before each order.
Do I need an electrician?
For assembly, no: tubes, connectors and fasteners are all hand-assembled. Only the final connection of the mains cable — live, neutral, earth — requires knowledge of what you are doing. If you are connecting to an existing light fitting or if you are not comfortable, have an electrician do only this step.
Does it require an external transformer or driver?
No. The power supply is integrated into the tubes. Nothing to add, nothing to house in a false ceiling, no visible boxes from the ground.
How do you get 120° angles?
There's no measuring required. The V and Y connectors mechanically dictate the angle: as soon as the tube is engaged until it clicks, the geometry is correct.
How long does the assembly take?
30 to 45 minutes for two people to install a 3 to 5 module kit, excluding electrical connection. Allow 1 hour 30 minutes to 2 hours for a 14-module kit, with most of the time spent on marking and fixing, not assembly.
Does it hold on plasterboard?
Yes, with suitable anchors like Molly bolts. The load is light and distributed across all connectors, which act as fixing points. For suspended ceilings, prefer attachment to the load-bearing structure or suspension by cables.
Can I expand the installation later?
Yes. The entire range shares the same tubes and connectors. You add bars and Y-connectors to extend the figure, without replacing anything.
One bar isn't lighting up, what should I do?
Cut the power, unclip the relevant connector, then firmly re-engage it until it clicks. This is the source of the problem in the vast majority of cases. If the bar remains unlit, contact us: it is covered by the 5-year warranty and replaced without the need to return the entire unit.
Can I install it outside?
Sheltered use only. The IP54 rating protects against splashes and dust, not against direct exposure to the elements. An awning, a closed carport, or an open garage are suitable.
Ready to equip your workshop?
Complete kit, ready to assemble and connect. Free delivery and 5-year warranty on the entire range.
A question before ordering? Call us at +33 1 84 16 45 42ou écrivez à support@hexeli.com
